Saturday, July 28, 2012

sh-09 disassembly to fix key contacts

The SH09 is a neat little keyboard, described on vintage synth explorer right here.

The sh-09 uses an unusual key contact system that I haven't seen in many other Roland synths. I believe it was probably some type of passing phase between j-wires and rubberized contacts.

This one came to me with bent contacts which caused some keys not to sound. I also noticed that the bent contacts could also cause mis-triggering of notes: if the envelope was left open with ADSR settings, keys with bent contacts would trigger other notes when they were released. This resolved to be an issue if the lower key contact (there are 2 per note) was bent away from the lower rail.

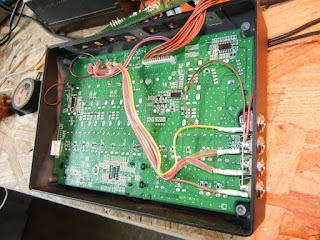
This was a somewhat difficult synth to dis-assemble. There are a large number of screws visible from underneath, and if you just remove them all you will wind up with a big jumble of parts (transformers, circuit boards, etc) spilling out like entrails when you open it up.Nobody wants that.  For that reason, I posted a few pictures of the necessary screws to remove when taking the synth apart. I count 13 all together, to remove the top cover from the bottom (metal) plate. I think I got them all here, if I missed any let me know.


sh-09 key contacts: this is an unusual setup.

On the back panel there are 3 screws to be removed- I marked these with a white box in this photo.

There are 10 screws here to be removed. I think I managed to list them all here.

Tuesday, July 17, 2012

Korg MONOTRIBE Mods: individual outputs and BD, SD, HH, SD noise DECAY

On this Korg Monotribe I added the switches and pots to control the Snare Drum Decay, Bass Drum Decay, High Hat Decay, and Snare Drum Noise decay. I also added the 4 individual outputs.

I used the schematic provided here at skatona-electrix , to set the individual decay controls,  as well as the information provided by monomodder , specifically his recommendation to use 3 k resistors in series with the individual outputs.All of this worked great.

One thing I noticed was that the SD noise mod had no effect. Then I realized that there was no SD noise output on the whole unit! I did some checking, first of all my own work, and then Korg's, and went on to find that C51 was loose from one of its pads. See picture 3. I think this was a factory defect, specific to this unit, but it turned a 2 hour job into a 4 hour job!

Anyway, we were happy with the mod, and should anyone be interested I would perform this procedure for 150.00 parts and labor.


Jupiter 8 vcf BEND fader issues

On this nice JP-8, which was here for a re-capping,  there were issues with the VCF bend fader on the bender board. The fader had no effect; it was pinned at "0" no matter what. Consequently the bender had no effect on the VCF. My first thought was to make sure the VCF pedal jack had no issues; the jacks are one of the most vulnerable areas on a keyboard, so it was worth testing that jack to make sure there were no shorts there, especially since it is so easy to test. There were none; and in retrospect it is possible that this would have an effect on the JP VCF bender because the microprocessor would probably ignore the jack input if it was unchanging.

The next thing I checked was the fader; faders and controls are also a very vulnerable part of all keyboards. In this instance I noticed that pins 1 and 3 were shorted (no resistance). Looking at the schematic, (figure 1), I could see that there was no way that pin 3 would be connected to ground unless (1) the fader was shorted (how could that possible be?), (2) the op amp, IC2, was somehow shorting pins 6 and 7 to ground, or (3) there was a piece of solder or a solder bridge touching the traces or some other type of mechanical issue.

I investigated for number 3 first, a solder bridge or piece of debris, since it seemed most likely, but to no avail. I then investigated for number 2, the possible "op amp short". There were some connections from that op amp to ground, so it was possible that it could be the culprit, but after removing it, the issue remained.

I couldn't imagine how a fader could short out, but I removed it anyway. When I did, I realized that it was soldered in wrong... the orientation was upside down, and consequently pins 2 and 4 (shorted by design) were in the holes designed for 1 and 3.

This is the second time I've encountered faders soldered in wrong, recently. The last time was on an EMU. I turned the fader the other way, soldered it back in, and all works fine!

As technicians, we look for failed components; but there are occasions where the components were never installed correctly in the first place, and sometimes  the problem was ignored for years and years.


Friday, July 13, 2012

Prophet 10

This is a beautiful instrument that suffered from intermittent lockups. There are a number of possible causes for this, but it's easiest to start with mechanical problems... by that I mean loose molex connections between boards, cracked solder around voltage regulators and filter caps, anything around heat sinks and all solder around electromechanical devices like the power switch, etc.  Cracks in circuit board are also prime suspects, as are socketed IC's where pins can work loose over time.

Start by using the highly advanced technique of poking around with a stick, (a non conductive poking device) while the unit is turned on, to see if you can induce the lock up. Poke around all those areas I mentioned. That's what worked here... see the highlighted portion of the photo... some IC's needed to be reseated and re tensioned. I found them by poking on them with the eraser of a pencil.

If that hadn't worked, I would have removed boards, starting with the power board, and then the microprocessor boards, and looked for cracked solder, especially around the heavy caps and the heat-sunk components.

If the visual inspection completely failed, I would have also checked the voltage rails with a scope to make sure the device was getting clean power.

Sometimes thermal issues can be induced by blowing some hot air (not too hot!) around various areas of circuit boards. Seriously, don't use too much heat, but often you can find a faulty component or other thermal issue by blowing some hot air on various areas to induce a lockup.

If you have a politician handy, you can get some hot air that way... if not you could use a hair dryer or a hot air soldering station with the heat turned down.

The integrated circuits in the highlighted area had worked loose. They needed to be carefully removed, the pins were cleaned with solvent and re tensioned. Notice that they are right above the Power Supply area... they were constantly being heated up. This surely contributed to their coming loose.